


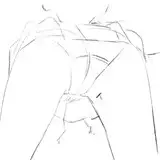
The legs are the biggest mass of muscles on your body. Before you begin studying the anatomy, take time to just draw some legs and see where your understanding of their anatomy is before you dive deeper. Use the reference images linked below.
https://i.pinimg.com/564x/3c/e6/00/3ce600d0aba0bb9406891a62a145a82d.jpg
https://i.pinimg.com/564x/0c/e6/7d/0ce67d992039eee276a69fbb1de377b8.jpg
Once you've done that, review the muscles above and draw them again, but this time try to see if you can name the muscles on the legs. Look for checkpoints such as the mass of muscle on the inside of the leg, right above the knee which is the vastus medialis. Similar to what I've said in previous lessons, simplifying a form first helps to understand the overall shape and silhouette of the body part, making it much easier to later go in and add the details. A method I use with my art is to outline the leg, or the arm first, then I use the knowledge I have about the specific muscles, and I name them in my head as I fill up the space within the outline.


The legs skeletal anatomy is similar to the arm. Instead of the radius and ulna, you have the tibia and fibula. They allow the foot to rotate left and right, although not as much as we can rotate our wrists.

I know that the foot can be a common problem among artists. It took me some time to figure it out, but once I started imagining it as a triangle from the side, it began to make a lot more sense. From the bottom, I also break the foot into shapes. Below the toes is the "ball" of the foot which can be viewed as a long rectangle, then the bridge of the foot, and finally the heel which I view as a circle, or square. Finally I just connect it all together. How did I learn this? Well I have the reference with me all the time, so I'd take photos of my feet or just look at it in the mirror while I drew it over and over again.
KEY NOTE
Don't spend more than a 1-5 minutes when doing these practices. They are to be seen as warmups, and meant to be done over and over again. There's not point in spending 20 minutes on drawing the leg or foot when you haven't built up the structural knowledge. Repetition is key my friends.


Muscles change shape as they are being used. For instance, when you grab your foot behind your back, you're pulling your quadricep (rectus femoris, vastus medialis, vastus lateralis, and vastus intermedius) muscles, and you feel a stretch there. Hence when you bend down to touch your toes, you stretch your hamstrings (semitendinosus, semimembranosus, and bicep femoris). When a muscle stretches, it flatten, thus the opposite side will relax and compress. Similar to when you flex your arms, your biceps compress and rise up while your triceps stretch out and flatten, vice versa when you extend your arm, your biceps stretch, and your triceps get comfy and large.

WHAT TO DO
Well now we've covered all the muscles on the body from the arms, the torso, and now the legs. What do we do with all this knowledge? We use it of course.
Visit
https://line-of-action.com/practice-tools/figure-drawing
and begin drawing the models. Select only nude models, both genders, and choose either 60 second - 5 minute poses. Have my study sheets available so you can refer to them at any time. Practice for an hour a day, 3-7 times a week.
You can continue to use the bean bag to help with posing characters too. However, don't rely heavily on it and only use it as a tool to develop your work further. For more reference, refer to these as they are key in helping you develop your anatomy skills like they have for me. Happy practices!
https://i.pinimg.com/564x/13/5b/e8/135be8dd1480fad242fd38e7d3436c1f.jpg
https://i.pinimg.com/564x/81/6f/75/816f75c61c17812401981c204431165c.jpg
https://i.pinimg.com/564x/4e/5e/d4/4e5ed493e0a09626b208155812035e44.jpg
https://i.pinimg.com/564x/8e/00/1d/8e001dfd1ebbcd47169e52cab7f88a5a.jpg


