Technical blog
Added 2023-08-20 16:07:59 +0000 UTC
First of all, I'm sorry for the long post. I've put a lot of work into everything, but it often goes unnoticed... and I thought it would be interesting to share some of the technical things I do on this project. For the ones that have a little technical knowledge about CG creation, this might be an interesting read to you.
When I started working on the previous release, I showed you the upgrades I was making to the engine, shaders and so fort. Overall, that was a fairly succesful move which helped getting the latest release in a better state and overall looking a bit more pretty and the cast more lively. There were still problems, unfortunately. After rendering one of the earlier scenes in episode 3, the MC wasn't playing well with the upgrades at all, and I had to revert back to the version I had in episode 2. The MC wasn't the only problem however...
- Detail skin maps
I added what is called a 'detail map' overlay on the skin of the characters. In the first iteration, this was simply a skin detail normal map that tiled across every part of the character in the UV space. The first issue with this was, that it needs to blend with the base normal map of the character in the correct manner, without bending the lighting in the wrong direction when pushed to extremes. The shader did not do this correctly.
The second problem with this was that every UV set on the character is at a different size or scale. The head occupies far more UV space than the body. The body is much larger than the head, so to try and make the two match, I had to guess the different scales and multiply that by the amount of times the detail map needs to tile. Eventually I managed to find a decent value for each of the sections (head, face, body, lips, arms, legs), but it would still give problems when a character is posed. This is most obvious in extreme poses, where limbs bend the furthest they can go.

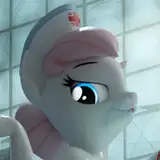
Here's an example of where Lily's neck detail just cuts off and becomes flat when it reaches the seam of the face.
I knew the solution for this at the time, but couldn't remake that part of the shader without it taking me a huge amount of time. The thing I was looking for is tiling the detail map in something called ' World Space' rather than 'UV Space'. On paper, this sounds super easy to do, but it really isn't. Especially when it comes down to normal maps. Anyway, after thinking about the shader code, digging online, dissecting everything what it needs to do, I've finally managed to do it.

In the old version above, you can see the neck doesn't match with the face , and there's a seam running between the neck and tje jaw line. This becomes even more apparent and ugly when the neck bends.
With the new shader I've written below, this doesn't exist anymore and the whole detail map tiles at an exact scale (that I can set with one value change), eliminating the seams completely. while still correctly bending the incoming lighting in the correct manner.

- Subsurface scattering
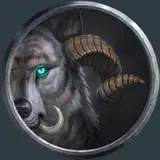
Subsurface scattering or SSS, was another feature I added to all characters. It transformed some of the characters from looking fairly dead in episode 2 to looking more alive in episode 3. It simulates the effect of blood flowing under the skin and letting light penetrate through thinner parts of it. Alexa was a pretty good example of this. Most information about SSS found on the web, has unfortunately been researched, tried and tested for white people and very little can be found about other ethnicities. In the initial version, I thought skin is skin and they all have red blood flowing underneath it. So I applied the same settings to the MC, as I did for Natasha for example. It didn't work at all, and the character became a blurry mess at far distance renders, which prompted me to revert back to the old version.
I spent some more time on it now and studied enough to understand the differences. Hopefully enough to make it look believable and better looking.


- Eye shading
I revisited the eye shading for a bit as well. One particular part that was driving me crazy, was the tear line. I ended up removing it completely in the later renders of episode 3, as the extreme highlights were driving me insane. Not exclusively to the eye shader alone, I've applied a proper 'Index of Refraction' or IOR to everything. This helps immensely with translucent surfaces like water and glass, or in this case, the cornea, lens, sclera and tear line.


- VRAM management
Another thing I was very unhappy about, was even with 24GB of VRAM, I was still running out of VRAM at times during the scenes with a lot of people. The gym scenes are a good example of this. THe DAZ to UE process, literally spits out the exact unoptimized setup that DAZ runs with. Every texture is a 4k or 8k single image, that just eats your VRAM so quickly. A single character in DAZ can easily have about 75 textures, which is crazy. Especially considering that every greyscale image can easily be packed in a single channel of a color texture.
A color texture has by default 3 grey channels. Red, Green and Blue or RGB. Knowing that, you can pack at least 3 greyscale images into these channels. That way, you turn 3 x 4k textures into a single 4k texture. reducing your VRAM consumption by 3 times! That's a massive victory for efficiency's sake! Anyway, that's exactly what I've done. Packing the greyscale maps all together. I'll need more of these in the future for wetness modfiers, tears and whatever else.
As an added, bonus, they are now also taken out of the sRGB color space which allows me to use the full black to white range per channel (a.k.a. linear space). Everything that comes out of DAZ by default is still sRGB which cuts out values in the lower end of black and higher end of white. This is the reason the tears looks complete trash in episode 2, as I couldn't get the roughness low enough to allow for clear reflections.

This has been a time consuming process and I'll still iterate on it for a little bit as I start rendering scenes for episode 4. Unfortunately, this has to be applied to every single character in the game. And I have a lot of those! But in the end, the quality will be going up and I'll be able to render faster, as it's now more efficient and easier on the VRAM.
Hope you enjoyed the nerd talk, but it will probably be mostly skipped and ignored... 😁
Have a good one,
Ezy