Below is a brief introduction to several commonly used interfaces. There are currently many versions of the SD UI, and the interfaces may vary slightly. This article primarily introduces the interface based on the diagram below.

Stable Diffusion Checkpoint:
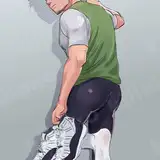
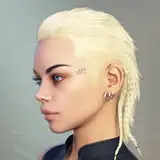
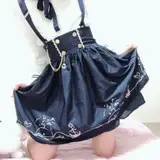
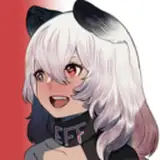
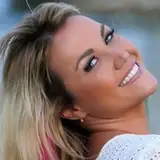
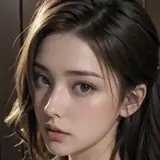
This is the base model of SD, usually with the file extension .ckpt or .safetensors The file size typically ranges from 1 to 10GB The popular chilloutmix model falls into this category Different models can produce significant differences in your artwork Some models have a realistic style, others have a 3D CG style, anime style, or fantasy style You can choose the model based on your painting theme Even within the same genre, the generated images can vary greatly For example, see the image below:


SD also provides a model merging feature, which will be discussed in future articles
The Lora model is a smaller model based on the Checkpoint base model The file size is usually a few hundred megabytes We can use multiple Lora models within the framework of the base model to generate the desired images We will discuss this in future articles as well
Tx2img:
This feature generates images based on text input You can enter positive and negative prompts below to generate the desired images (we will discuss prompts in a future article)
Sampling method:
There are over a dozen different image generation algorithms available The generated images may differ slightly between algorithms, but the differences are often not significant The generation time may vary slightly as well Currently, several algorithms with the ++ symbol are popular, such as DPM++SDE, DPM++2M Karras, etc. These are updated versions of the algorithms
However, it is important to follow the recommended settings provided by each model author These recommendations are based on continuous adjustments to achieve the best results

Sampling steps:
This refers to the number of sampling steps in the algorithm The more steps you choose, the longer the drawing time will be It is generally recommended not to exceed 30 steps, as higher values may not result in significant image changes, while lower values may produce strange images

Batch count:
This determines the number of generated images You can set it according to your preference, but generating a large number of images at once may exceed the memory limit of your graphics card and cause crashes Please adjust it based on your graphics card's capabilities
Width and height:
Usually, selecting 512x512 or 512x768 is sufficient It is said that the early NovelAI database used these dimensions for processing If the resolution is set too high and the image size is too large, AI may fill in blank areas with objects you may not want, resulting in strange images Of course, you can increase the resolution according to your needs However, if the image size is too large, it may exceed the memory capacity of your graphics card and take longer to generate It is generally recommended to generate smaller images and then upscale them if needed We will discuss how to upscale generated images in a future article
CFG Scale:
This determines the relationship between the generated image and the prompts However, a higher correlation does not necessarily result in better images A value around 7 to 10 is generally recommended Setting it too high will not improve the quality of the images and may instead generate odd pictures

Hires.fix:
This is a feature for high-resolution restoration. Small-sized images generated may have blurriness issues. This function can help improve and enlarge the image. However, it may be time-consuming, and the effectiveness can vary depending on the model.
Denoising:
This is a redraw setting option that appears after selecting Hires. Generally, a value around 0.2 will resemble the original image. The higher the value, the greater the difference from the original image. It is not necessarily better to set the value higher. Adjust it according to your needs.

Seed:
After generating each image, a seed code is provided. You can use this code to generate more similar images. Alternatively, you can click the dice to disable the seed function.
The introduction to the SD WEB UI features concludes here. In the next article, we will discuss how to write prompts. If you found this article helpful, please consider giving it a like to encourage me to continue creating.
二、SD WEB UI介面介紹
下面簡單介紹幾個常用介面
SD WEB UI現在有很多版本,介面可能會有些許差異
本文主要依照下圖來介紹
Stable Diffusion Checkpoint:
這是SD的基礎模型,一般的程式後綴是ckpt或是safetensors
一般大小可能在1到10GB
現在很熱門的chilloutmix模型就是此類
不同的模型會對你的畫作產生重大差異
有的是寫實風,有的是3D CG風格,有的是動漫風格,有的是奇幻風格
可以依照你的繪畫主題進行選擇
即使都是真實系,生成的圖片也會有很大的不同
例如下圖
SD另外有提供模型合併的功能,這部分留待以後的文章介紹
而Lora模型則是在Checkpoint基礎模型下的小模型
一般大小大概幾百MB左右,我們可以在基礎模型的框架下
利用多個Lora模型來生成我們想的圖片,
這部份我們也會在之後的文章提到
Tx2img:
這是文字生成圖片的功能,你可以在下面輸入正向與反向提示詞來生成你想要的圖片(提示詞的介紹我們將會之後講到)
Sampling method:
裡面有十幾種不同的圖片生成演算法
不同演算法間生成的圖片會有差異,但往往差異並不大
生成圖片時間也會也有些許差別
目前主流是使用有++符號的幾個演算法
例如DPM++SDE DPM++2M Karras等
因為他們是更新過的新版算法
但最重要的是依照每個模型作者的建議設置即可
因為這是做是不斷調整後給出的最佳建議
Sampling steps:
這是演算法的取樣步驟數,你選擇的步驟數越多,所耗費的繪圖時間也越久
一般建議不用超過30,太高可能圖片的變化也不大,太低則會出現奇怪的圖片
Batch count:
生成的數量,依自己喜好即可,但一次生成數量太多顯示卡可能會顯示記憶體不足而導致當機,請自己依照顯卡等級設定
Widgh and height:
一般是選擇512X512或512X768即可
據說是最早NovelAI的資料庫在進行演算處理時
資料庫中供AI學習的圖片大都是這種尺寸
所以解析度設定太高,圖片尺寸太大
AI為了去填滿其他空白的區域,就會用其他或許你不想要的物件填滿空白
可能就會造成生成奇怪的圖片
當然你也可以依照自己的需求調高解析度
但仍是一樣,如果圖片尺寸調太高
顯示卡記憶體可能會不夠
生成大尺寸圖片也會比較耗時
一般建議生成小尺寸圖片生成後再進行放大處理即可
關於如何放大生成圖片
我們也會在之後的文章提到
CFG Scale:
這是你想要生成的圖片和提示詞的關聯性
但並非關聯性越高越好
一般建議在7到10左右
設定數值太高並不會出現更好的圖片
反而可能生成奇怪的圖
Hires.fix:
這是高清修復的功能,一般小尺寸圖片生成後會有圖片模糊的問題
可以用這個功能加以改善並放大圖片
但會比較耗時,不同的模型可能效果也不同
Denoising:
這是點選Hires後會出現的重繪設定選項
一般在0.2左右會跟原圖類似
設定數值越高,會跟原圖差異越大
並不是越高越好
可依照自己的需求調整
Seed:
每生成一張圖片後,都會有一個種子代碼
可以用這個代碼生成更多類似的圖片
也可以點選骰子不使用種子功能
SD WEB UI的功能大致介紹到這裡
下一篇文章我們會講到如何寫提示詞
如果覺得本篇文章對您有注意
還請不吝惜點個讚
鼓勵我繼續創作下去
Dream Girl AI TV
2023-05-25 07:08:21 +0000 UTCOverdoser
2023-05-25 03:51:44 +0000 UTCDream Girl AI TV
2023-05-25 01:03:07 +0000 UTC伶 雨
2023-05-24 22:54:34 +0000 UTC







![[AI]久保翠&克勞蒂雅](https://nokimo.com/istorage/65716.jpg)