(ComfyUI Workflow) Wan 2.1 Fun Inp - Advance ver.20250403 - For Patreon Supporters
Added 2025-04-03 18:16:19 +0000 UTC
Video: https://youtu.be/M4Lh1UkwlEQ
Related Post: https://www.patreon.com/posts/125857472
Creating smooth, high-quality AI-generated animations using frame interpolation just got easier with the WAN 2.1 Fun InP model and Tile LoRA upscaling . Here’s how to refine your workflow and elevate your video outputs:
1. The Core Workflow: Frame Interpolation with WAN 2.1 Fun Inpaint
Step 1: Set Up Your Model
Download the WAN 2.1 Fun InP model (1.3B or 14B) from Hugging Face and load it into ComfyUI via the Diffusion Models folder. Use the native Wan Fun InP 2 Video node for seamless integration.Step 2: Prepare Start & End Frames
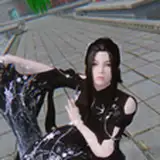
Choose two images with consistent composition (e.g., same character, minimal pose changes). For example:A sports car’s front view (start ) and rear view (end ) for a dynamic camera orbit.
An elf casting magic with slight water motion variations.
Step 3: Encode Visuals with Clip Vision
Batch your start/end frames into an image batch and encode them using Clip Vision H . This helps the AI “visualize” transitions, reducing morphing artifacts.Step 4: Generate Base Animation
Configure width, height, and settings (with CFGZeroStar ). Generate the base video—expect some trial and error with seeds to avoid deformations.
2. Boost Quality with Tile LoRA: Upscaling & Refinement
Once you’ve generated a base video:
Step 1: Upscale with Tile LoRA
Apply a 1.5x upscale using Tile LoRA models. This sharpens details (e.g., facial expressions, clothing textures) without distorting the animation.Step 2: Skip Layer Guidance? Not Here.
Avoid using skip layer guidance during upscaling—it can warp frames. Stick to CFG0 for cleaner results.
Example Outcome:
A morphing elf video gains smoother water effects and crisper character details after upscaling.
A drifting sports car clip retains motion flow while reducing background inconsistencies.
Why This Works
WAN 2.1’s Strengths: Handles complex transitions (e.g., camera rotations, subtle pose shifts) better than older models like LTX.
Tile LoRA’s Role: Adds polish after interpolation, ensuring your final video balances creativity and clarity.
Pro Tip: For static subjects (e.g., a beetle flapping wings), pair this workflow with inpainting tools like Flux ACE+ for even smoother motion.
Final Takeaway:
Frame interpolation + Tile LoRA = professional-grade animations with minimal effort. Experiment with seeds and compositions to nail that “lucky shot” every time!
Ready to transform your AI video projects? Let’s get interpolating! 🚀

Attached workflow below, have fun:)
Comments
Hey. So the idea can be multiple groups of sampling for a extended video length with multiple start-end frame. Base on idea, I think you can take the last frame from the first batch , and put as the first frame of the second batch and so on. But text prompt, I would not suggest having the same text for all. Because there might need different motion for other batch of frames. So I will plan it out how many pairs of start-end frame first before implement this.
Benjamin Law
2025-04-04 14:02:21 +0000 UTCHi, the workflow is very interesting, as always! I'm trying to figure out how to possibly chain multiple start-end frames in the same workflow that respond to a single prompt. Do you think it's possible?
AK_AI
2025-04-04 12:13:06 +0000 UTC