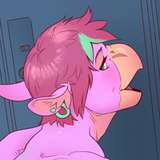
So far, this week's batch of elements is entirely composed of filler elements, so I can inhabit some of the dead space remaining all over the place. And since there's nothing sexy to show you all, I thought that, maybe, you'd be interested to see a little behind the scene making of about how I do things for the Cartoon Car Wash.
First, I have my scene and my reference picture around the spot I want to work on. To allow "Photoshop" and "Clip Studio" to work on a somewhat normal speed. My scene isn't the full picture, but a fraction of it. But I do have a layer containing the full picture in there so I can slides things around if necessary. It's usually not really useful since I usually work via sections, but it was really useful this time around since I'm filling stuff all over the place.
I always make the linework on "Clip Sudio". "Photoshop's" lines are a bit blurry for some reason, if you don't work in vectors, and I haven't worked with vectors since de death of "Adobe Flash". Also, "Clip Studio" will adjust your lines just slightly to get rid of any unplanned tremors in your hand and it's just magical.
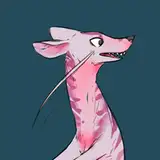
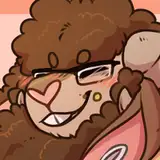
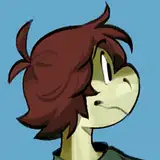
I first do a rough sketch, of what I think it should look like . That part can something necessitate 2 or 3 pass for something complicated. I can also work on several layers (color coded differently) if I'm working on more than one character. But this one was fairly simple and only necessitated 1 pass and 1 layer.
On another layer ( two in this case) I than sketch the details of the characters. I often use several layers, so I can move things around and adjust elements as I go. Each character goes through this so if a scene has more than one character, I can end up with several layers of sketches all color coded differently so I can easily differentiate what line is what. Here, I used the 2nd layer for the overlapping hand and feet. I ended up sliding the right foot to the left, for a more natural pose. I, then, turn off the rough sketch layers on that element for clarity.
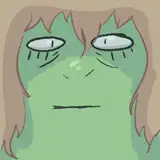
The linework is done pretty much the same way. Several layers for me to be able to continue the lines further than necessary to avoid weird connections issues or to adjust things as I see it. You can also see that I've flipped the image at this point. I try to always do this. Orient the image one side for the sketch and than flip it for the linework so I can spot any problems that I might not have seen in the first direction. Brains are funny like that, you might think something is perfect one way, and flip it only to realize your proportions are all over the place. So I try to always flip it, adjust the sketch, do the linework, flip it back and make the last adjustment.
Finally, I clean all the overlapping artefact, merge and the lines (make them black), add and clean a layer of the silhouette that will be quite useful when come the coloring process, and the linework is done and ready to be move to "Photoshop" for coloring.
From what I know and have tested, "Clip Studio" is fine for coloring, but I just know "Photoshop" really well at this point, so it's faster for me to keep working with it.
"Photoshop" also deal a little better when it come to the massive files I'm working with.
That's it for now.
See you once I'm done coloring this batch for part two ^^
Alx