Here's part 2 of the process video for my Roses painting! I just posted part 1 - check out the feed to see it.
Here’s some information about the process videos:
It has been sped up by 200%, so 2 times the original speed.
This painting session took me about 4 hours, split up into two drawing sessions.
I mostly used the hard round brush from my own brush set to paint this. I also used a ‘soft smudge’ brush to soften the edges. I got this brush from Yuming Li’s set that I got when I signed up to their Patreon.
This is painted in Adobe Photoshop. You can replicate a similar workflow in Procreate, with the exception of the gradient tool and the number of layers used!
I also recorded some of the process with my phone to create reels / tiktok videos from. I compiled those together as well - I’ll be posting that after these two process videos!
Here are some helpful resources that can help understand this process in more detail:
Resource // drawing plants: This is the challenge resource video for the plants challenge, in which I chose to paint round, pink roses very similar to these. In this video, I run you through my full process and talk about which design challenges were involved.
Tutorial // stylizing trees & plants: In this tutorial, I talk about how you can divert from a reference image to create a stylized interpretation of a plant. The demo also runs you through how I paint a rose.
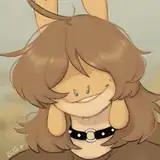
A FRESH START
At the end of Part 1, I realized that I didn’t like the hand-painted rendering style I was using to finalize this painting. That’s why I go back to an earlier version of the roses and start again from there. (This is why I like mapping my progress in the separate layers below: it’s easy to click them on and off to see if the painting is getting better or worse!) When I start again at 21 seconds in, I decide to focus on using the lasso, gradient, and smudge tool instead of the hard round brush. This allows me to build up detail in a much softer, gentler way. It’s less about lines and more about gentle, semi-translucent layers of color. This is a much better technique for preserving the soft feel that I was going for!
SATURATED EDGES
In order to lean into the softness, I use a smudge brush to soften the edges of the petals. It’s the soft smudge brush from Yuming Li’s set that I got when I signed up to their Patreon and it’s great for this effect because it also has a little bit of a gentle noise texture to it, which prevents it from looking too blurry. You can see me doing this at 15:09 minutes in! I love the soft effect this gives, but I also feel like something is missing. I want these edges to not only feel soft, but very alive and vibrant. That’s why I decide to add some saturated color to these edges, which I do at 22:40 minutes in by creating a separate layer below the roses. I love the surreal effect this gives, and I end up using it all over the painting - also for the leaves and stem. It also ended up inspiring me to create the chromatic aberration studies that I posted last week!
I hope you enjoyed the process! I also recorded some of the process with my phone to create reels / tiktok videos from, which I compiled into a little process video. I’ll be posting that in a minute!
Michael H
2025-07-30 14:08:21 +0000 UTCMichael H
2025-07-30 12:57:44 +0000 UTC