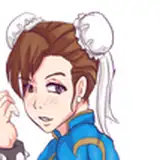
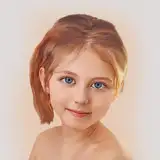
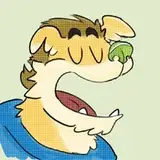
Here's part 3 of my process for my dark mode painting! Part one and two just got posted - check out the feed to see it. This painting is intended as a companion piece to my light mode painting. I didn't record the final hour of rendering, so unfortunately this stops right before the end, but I still think it's a pretty good representation of my process!
Here’s some information about this process video:
It has been sped up by 200%, so 2 times the original speed.
This painting session took me about 6 hours and 15 minutes, split up into multiple sessions.
I edited the process into three parts. This is the final part!
I mostly used the hard round brush from my own brush set to paint this. I also used a lot of brush & smudge combinations to paint and then soften edges.
This is painted in Adobe Photoshop. You can replicate a similar workflow in Procreate, with the exception of the gradient tool and the number of layers used!
I wasn't able to record the entire process, unfortunately - but I did record 90% of the process, so this is the whole thing minus the last hour or so of rendering.
Here are some helpful resources that can help understand this process in more detail:
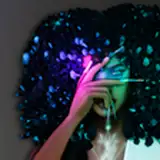
Soft & hard edges with the lasso tool: This is a technique I use a lot in this video - except rather than using a large noisy brush, I use the smudge tool to soften the edges. This tutorial runs you through how I gradually layer shapes to get this semi-translucent effect.
Creating interesting & flowy shapes: This tutorial is all about how I combine different types of shapes to create a sense of movement in my image.
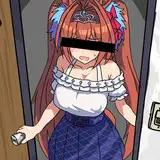
STARTING OVER
I was super bummed to have to start over on the dark mode spirit, but I was surprised by how easily it went once I got started. I think that’s because I had already tested out something that didn’t work, which makes it much easier for me to decide what does work. I also know that I want the drawing to resemble the Light mode spirit more, so I can use that as a template. I also make some changes to the girl’s pose and expression so that she appears more hypnotized / controlled by the spirit. Once I do this, I feel like the whole concept works so much better!
LAYERING DETAIL
Once the foundation works well, it just becomes a question of gradually layering on detail. My technique of combining the lasso tool with the gradient allows me to continually layer on semi-translucent shapes of detail to get a 3-dimensional feeling. It’s a really great technique if you’re using photoshop - and with Procreate you can just use a soft brush instead of a gradient! Again, my tutorial on Soft & hard edges with the lasso tool walks you through the details of the workflow.
Unfortunately I didn’t record the last hour or so of the process, but since this video brings it to 90% completion, I figure it still gives a good sense of my workflow! I hope you enjoyed it and as always, let me know if you have any questions 🖤
Loish
2025-05-29 11:14:06 +0000 UTCMichael H
2025-05-28 15:33:31 +0000 UTCMichael H
2025-05-28 14:32:24 +0000 UTCLoish
2025-05-27 13:58:12 +0000 UTCPilar 🌿
2025-05-23 10:08:35 +0000 UTC