As promised, here’s the full process of my Glare painting from last month! I split it into three parts, and this is the first of those three. The next parts are coming right up!

Here’s some information about this video:
This first process video has been sped up by 250%, so 2.5 times the original speed.
This painting session took me 10 hours in total.
I mostly used the hard round brush from my own brush set to paint this.
This is painted in Adobe Photoshop, but the same workflow can be applied to most digital painting software!

Here are some helpful resources that can help understand this process in more detail:
Creating a strong composition: This tutorial talks about how I arrange different elements to create a sense of visual flow in the image. This played a huge role in making my creative decisions for this painting!
Creating emotive art: This video talks about how I use various decorative elements and visual styles to put the focus on mood and emotion in my artwork.

STARTING FROM A THEME
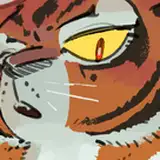
This video begins with a series of older paintings I’ve made over on the left side. I knew I wanted this painting to have a similar vibe as those paintings, with a focus on darkness, mystery, and nature. I’m not someone who wants to create really complex stories or narratives in my art, but instead I aim to capture certain vibes and moods. That sparks my inspiration the most! So that’s why I have some of my previous artwork open as a reference for this process video - sometimes that gets my creativity flowing more than a blank canvas does!
BLOCKING IN ELEMENTS ONE BY ONE
This painting has a couple of layers to it: there’s the character, but also the moths and branches in front of her, as well as more branches and the moon behind. I want these elements to be arranged optimally so that we get a nice, flowing composition with a clear focal point. That’s why I start by blocking out each element in a separate group. Each group has its own sketch and color silhouette, and I can tweak the positioning of them separately from one another. I usually prefer working on one layer, but for this painting I keep my layers separated throughout the entire process so that I always have more freedom to make these compositional adjustments. This is something I talk about in more detail in my tutorial on creating a strong composition!
OUTER GLOW EFFECT
In order to make elements really feel like they’re glowing, I use something called “Outer Glow.” This is a Photoshop layer style that creates a soft glow along the outer edges of the layer. You can adjust the size, opacity and color of this outer glow. It is such an excellent shortcut for paintings like these - I use it for the moths, the moon, and her glowing eyes. In the case of this painting, a deep orange/red glow worked best! Here’s a little walkthrough of how to apply the outer glow layer effect in Photoshop. If you’re using different software, you can duplicate the layer, lighten it, and apply a gaussian blur to create a similar effect. Here’s a video on how to do that!
COLOR ADJUSTMENTS
At the 45:09 minute mark, I make some important color adjustments. The reason for that is because I took a picture of my cintiq screen with my phone, and the colors in this picture looked so much better than the actual colors of the painting. The camera had made some auto-adjustments to the brightness and saturation that made it look so much more vivid and intense! So I open this picture in Photoshop and move it to the left as my reference, and then tweak the colors of my painting to look more like the picture. I feel like that did so much to bring this color scheme to life!
I hope you like this video - keep an eye out for part 2 and 3 which are coming up in a minute!
Loish
2024-12-18 13:02:09 +0000 UTCLoish
2024-12-18 13:01:48 +0000 UTCNana
2024-12-18 02:53:21 +0000 UTCSK
2024-12-17 14:26:40 +0000 UTC