I went kind of crazy with textured brushes for this one, so I figured this would make an interesting subject for a process video! This way, you can see how I handle texture and build up the detail in my speedpaints.
Here’s some information about these process videos:
The process has been sped up by 200%, so 2 times the original speed.
This speedpainting session took me about 2 hours in total.
I mostly used Yuming Li’s brush set to paint. Find them here!
This is painted in Adobe Photoshop, but the same workflow can be applied to most digital painting software. You can substitute gradients for a softer brush in Procreate.
This was my reference, although unfortunately I could only find it on pinterest.
Here are some helpful resources that can help understand this process in more detail:
Stylizing trees & plants: This tutorial talks about how you can divert from a reference image to create your own stylized interpretation of trees and plants.
Soft & hard edges with the lasso tool: This tutorial talks about how you can contain textured or soft brushes within a selection shape, which gives you crisp and sharp edges while also having rougher or softer edges. This is something I do quite frequently in this process video!
BRUSH SEARCH BAR
I find it overwhelming to try out each different brush, especially in a set as huge as Yuming Li’s set. It’s much easier for me to search for a certain brush at the moment I need it. The Photoshop brush has a little search bar, so sometimes I just type random words into it to see if it brings up the type of thing that I’m looking for. It’s very hit-and-miss, but sometimes it gives great results!
CREATING COMPLEXITY
The reason I wanted to play around with textured brushes is because they create a sense of complexity and randomness. I feel like that is so difficult to draw by hand - no matter what I draw, it ends up looking too neat and intentional. Textured brushes can create the right kind of randomness to give the impression of bark, leaves, or rocks in the snow without literally drawing them one by one. An example of this is about 3:10 minutes in, where I pick a brush called Impasto - rough II. I apply it to the upper area of the painting to create some complexity around the main trunks where the thinner branches will go. This is just so that the area around the finer branches will have more density and chaos to them, saving me the work of having to draw each individual branch. I tend to paint this type of texture on a separate layer and then mix it with the eraser. That way I get some randomness but also a little bit of control!
CLEAN EDGES VS MESSY TEXTURE
I’m definitely someone who defaults towards using clean, crisp edges in my art. This is why I love using the lasso tool! However, I sometimes feel limited by that, especially when painting landscapes and nature. It’s really hard to capture the complexity and detail of a natural scene if you’re painstakingly defining every edge. That’s why I wanted to play around with textured brushes for this one: to break out of that pattern. But during this process video, you can see that it’s not easy for me to let go of it! I cycle between cleaning up the edges and then going back to messier texture. You can see that at 8:41 minutes in: I start detailing with my default method of using the hard round brush and focusing on the contours. Then I go back and start over with a more textured brush because I realize that my drawing is becoming too defined and clean. It’s hard to break old habits, but hopefully I’ll get better at embracing the messiness of texture!
GIVING BRIGHT AREAS A BOOST
For this study, I really wanted the snow on the branches to stand out the most, because the shapes and contrast with the tree are really appealing. In order to give the snow a contrast boost, I apply a saturated color along the outer edge. I do this at the 46:20 minute mark: first I create a new layer, then I set it to overlay, and then I paint a bluish color along the outer contours of the snow. Because it’s on a separate layer, I can tweak the hue a bit to get the color just right. I think this is a great technique if you ever want a specific area of your painting to stand out: create bright, saturated edges around those shapes using an overlay layer!
Here's the final result of the session:

I hope you enjoyed this video! As always, feel free to ask if you have any questions ❤
Loish
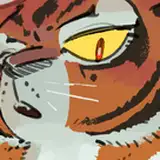
2024-11-29 12:24:54 +0000 UTCFelideya
2024-11-28 18:06:05 +0000 UTCIbrahim k
2024-11-27 11:15:08 +0000 UTCLoish
2024-11-26 09:40:10 +0000 UTCLoish
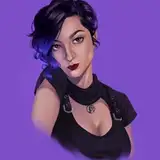
2024-11-26 09:39:58 +0000 UTCRaquel
2024-11-25 15:46:10 +0000 UTCAlessia Costola
2024-11-25 11:42:12 +0000 UTCWillmann Fabrice
2024-11-25 10:15:12 +0000 UTC