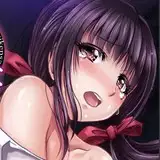
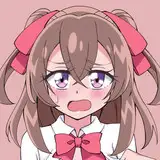
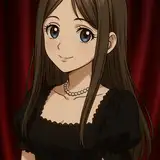
I finally put together the process for my growth painting! I’m really pleased with this illustration - I feel like it brought together my ideas and stylistic choices in a way that feels unified and consistent. I really liked my original sketch and it was definitely challenging to make sure that my rendering and painting style didn’t change it too much. I had to strike a precarious balance between enriching the image but also not losing the qualities of the rough version! I divided the process into 3 parts, plus some snippets that I filmed with my phone. Each one has been sped up by a different amount. I’ll be posting them all today, so keep an eye on my feed if you want to see them all!
Some basic information about this process video:
This is part 1 of 3 parts in total.
The process has been sped up by 250% - so 2.5 times the original speed.
This painting took me a total of 10 hours to make.
The main brushes I used:
I used the Macalabs pencil brush to sketch the initial lines: http://cbr.sh/fg8up?ref=loish
I used the hard round brush from my own free brushset to blend and paint.
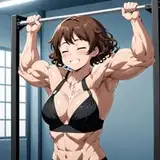
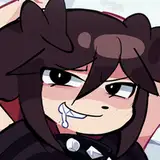
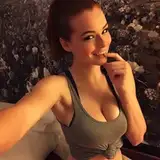
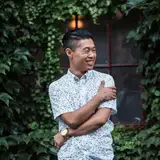
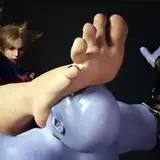
A lot of people pointed out that they liked how the hands turned out for this one! I referenced my own hands for this image. Here’s the reference picture, taken with my webcam:

Some things to keep in mind while watching this video:
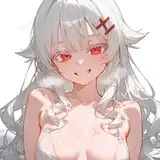
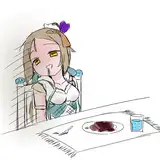
ROUGH PAINTING
My main priority at this stage of the painting process is to get my idea and rough sketch/colors down. I feel like once I have established that foundation, I can always spend time cleaning stuff up and finalizing the details later on - but the foundation needs to work. So that's what I'm focusing on and that's why the process is quite messy in the early stages. For example, I don't really draw individual leaves or plants - I just draw a bunch of random shapes and scribbles that represent them. It just needs to look good from a distance so that I know that I can build on the foundation. If you want to know more about my process for these early stages, I have a tutorial about using your creative spark to generate ideas. That one includes a demo that shows you how I create these rough painting set ups as well as an explanation of how I come up with ideas and translate that into thumbnails and rough paintings.
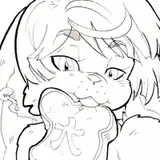
COLOR VARIATION
I’m happy with how the colors turned out for this painting, and I think that has a lot to do with how I approach color in the early stages. I started with a green base and added some warmer accent tones, and about 9 minutes in I feel like it could use a little bit more color variation beyond those two main hues. So at this point, I create an overlay layer and paint some deep cobalt blue tones onto the painting which blend in really nicely with the existing colors. It's not that I'm trying to paint specific plants or parts of her body blue - I’m just layering it on for the sake of the color itself in order to add more complexity. This is something that ends up influencing the final painting a lot: you can see that there are some deep blue splashes of color towards the bottom, and I end up adding some blue flowers as well to push that aspect of the color scheme. I think this is a really good example of some random scribbles and brushstrokes can have so much impact on the final work. That's why I think it's really important to work in a rough and loose and impressionistic way in the earliest stages of the painting. It just gives you a lot to work with later on!
The second video is coming right up!
Loish
2025-01-16 14:50:53 +0000 UTCRaoul
2025-01-15 19:07:50 +0000 UTCLoish
2025-01-13 11:52:52 +0000 UTCjuloyola
2025-01-11 08:16:43 +0000 UTC