YO FOLKS!
(LOTS OF WORDS INCOMING. The only TLDR is "Too long, DID read")
Super sorry for the lack of posts, things have been way busy. I mentioned last time I posted that shit was gonna get real busy for me- AND BUSY IT DID. Everything went well, and I got back about a week ago.
BUUUT I hit the fuckin' floor RUNNING and have probably been the busiest I've been in years lmao. Like, wake-up, work on stuff, sleep. Every day since I've been back xD.
But that's no excuse, I have to be posting more. I was really hoping Postybirb would allow me to include images in the text box, firing that off to patreon and subscribestar would help a lot, but that functionality doesn't exist unfortunately.
That said, if I did SHORTER updates that didn't need so many images, then postybirb would work out just fine. So definitely worth keeping in mind for future posts.
OH real quick - Vixel's been prepping the build. There's a lot in this one so there's a lot of stuff he's been needing to tend to.
---
So what's some of the stuff I've been up to?
During BLFC, I got a TON of inspiration to work on some small projects. I'll keep a couple hidden for now while things are still kinda mercurial, but ONE particular project has taken a majority of my time recently, so I kinda owe it to y'all to share what I've been up to.
Unfortunately, it's not TFOL related. But at the same time, it's VERY TFOL related!
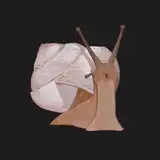
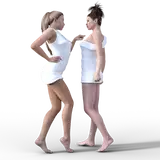
It all started off with this (it's the above gif)

During my recent sculpt doodles on the Ipad, I started doodling a Mabel. One thing let to another, and I ended up with a fun design that is soooorta simple-ish enough to be a silicone toy.
That's a medium I've been wanting to learn, if nothing else but to demystify it. So I asked around a few peeps, for possible collabs or just general advice, and most folks (understandably) said this would be very difficult and didn't really want to touch it haha.


But the resin print of her came out well, so... I got to thinkin...
But I had a bunch of ideas of how I could pull it off. Spoiler alert, I don't really have anything to show for all the effort just yet, but the DAYS of learning/struggle has absolutely paved the way. As I'm typing this the first piece is being casted as a test!

This project actually started a bit before BLFC, so I was already printing things before that con. As soon as I got back though, I was off to the races. I've probably dropped about 100$ of resin so far on failed pieces xD Not print failures (well one or two) - But Mold failures, in some way or another. (Meaning the casts wouldn't work.)
BUT NOW
BUAHAHA
So over the past few weeks, I tried a few things:
- THE SEVEN PART MOLD. lmaooooo

Mabel is a complex shape. And I love the limbs flopping about, so I wasn't about to just turn her into a dumb sleeve. So to successfully these shapes from a mold, I'd need to get creative. AND CREATIVE I WAS.

This didn't work at all. The concept was sound, but resin printers AREN'T 100% perfect all the time. If the prints came out PERFECTLY, then this totally would've worked. Resin printers aren't 100% perfect, and my printing skills are also pretty baby, so I'm making mistakes that aren't making it easier lmao.
Basically this 7 part mold had like, 20+ points of contact that NEED TO BE FLUSH. Haaaah-not happening.
- Normal ass silicone molding
Pour silicone over a printed positive of the figure! Cut the figure out of the mold, and bam, now you have a mold.
So this I didn't actually even try. When I went to the nearby special effects/materials store (lol, very surprised Denver has one) - The dude insisted on resin printing the mold instead.
It indeed had a lot of perks, so I decided to go this route.
Once my 7-part failed, I reconsidered this route again, but after watching some videos, there's A LOT of particular nuance to pulling this off correctly, and it seems expensive to figure out haha, especially for something as complicated as a full figure.
- Action Figure Assembly!
Now this was truly the best of all worlds. Part of the issue with printing molds is that a 3D Printer is only so big. And this figure is on the larger side. And the mold is the OUTSIDE of that figure. By a significant margin.

So I always figured, if all else fails, just print each part and assemble them later like an action figure. You could print registration keys, and silicone could be great for that.
Plus, I always heard that attaching or fixing silicone was difficult. ABSOLUTELY NOT THE CASE. There's "Sil-poxy" - like a silicone epoxy, and you could literally just pour more normal silicone and use that as a glueing agent. SO, attaching limbs to a figure shouldn't be an issue.

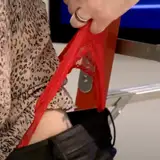
This is 2 separate cured silicone pieces. First, I just put the Silpoxy between the two. This held pretty strong, but with enough effort, you could tear them apart. So once I applied it to the edges, this shit's BOUND for LIFE now.
--
This is where things have ended up. At this point I've probably re-made the cut outs and whatnot on blender like, 4 or 5 times. I've been learning new things each iteration, and now I've finally got a really optimized workflow, and hopefully end product.
Just last night I finalized all the print files, so I don't have any printed just yet, so I can't show. BUT here's some blender examples.

I ran into probably every problem under the sun during creating these. And worst part is most of this is like, a really complicated 50+ combo of actions with lots of opportunities of wrong settings per action, AND it's all destructive lmao. AND some of it requires re-meshing, which can easily result in the program crashing xD
But we fuckin' get there. This is optimized for sturdiness, resin saving, cleaning-friendly, support interference. Fuckin' everything. 3D printing sucks.
---
At some point over the last week, I thought - I really need to shelf this. I need to do more work on actual TFOL.
But this fucker became personal lmao. And I kept randomly getting epiphanies for things to try. So now I'm basically completely on track. I have to wait for prints, but I might have a fully assembled Mabel within a week!
The last piece to this puzzle is COLOR.
This is another part that seems to have some mystification on it. So far I've only heard people talking about a few different ways of painting silicone.
First and foremost, Pouring. Mix the color before hand, and there ya go.
Uniquely, a reverse drawing? - marking details on the INSIDE of the mold, then doing the pour. The results are pretty crappy visuals imo.
Then alternatively - You can airbrush color and build up layers to get there. This is uuuusually better for more realistic stuff. For cartoonier things, I'd need a solid way to mask stuff. This is actually something I haven't tried myself, and is likely something I will need to do to pull off Mabel.
Here are a few more that I did when experimenting.

Dipping - Pretty obvious, have a cured piece of silicone, prepare the silicone colored paint, prepare enough to dip it.
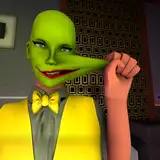
Detail Water Color - This one, I haven't heard of people doing. And it's DOPE. This allows us to actually do like, lines of detail. This is how I did the black on her face.
Basically go over a spot with a little bit of the silicone paint, this will wet the surface, which will act like a mask. Then come back with a more loaded brush of the paint, and dab to transfer the paint over. It'll stay within the masked space unless you add too much. If ya fuck up you can just wipe it up and start over.
---
There's definitely parts of Mabel that dipping would be do-able. But the Detail Water Color method DOES NOT work for large areas of color, say, her chest or something. Dipping would likely be a better solution here.
Problem with silicone painting is it is very viscous, AND, it wants to settle as much as possible. So it's viscous to work with, and then if it can, it'll dry/spread as flat as possible. So paint might be the right spot for the first little bit, but a few minutes later, it will have settled to crevices and the lower parts.

This is likely where the airbrushing is going to be a necessity. With proper masking and workflow, I should be able to color the larger parts with thin layers. The thin layer will stick to the surface no matter what the topography looks like. Plus you can air dry it much faster when it's thin layers like that.
I don't even have an airbrush so I can't test this yet. But I'm pretty sure it'll work.
---
WHEW. That's a lot.
I definitely understand why people don't want to tackle a project like this. But I think it's a shame that nothing exists to this level >STILL<. The stuff I'm trying is like, literally my first gut-instincts to try. And most of these things are actually working. I think more people need to tackle these materials, because they aren't actually super scary, and the more heads we have working on stuff like this, the more we can share information and make better stuff! I'm hoping once this is done, this will inspire other creators to come up with even more efficient methods than mine. It'll be cool to see more figures like this available.
SO. What are my end goals aside from this one?
I don't usually like talking about things unless they're 100% certainly gonna happen, but oh well.
I've been in contact with some factories on alibaba to see if they'd like to give her a try, and one is willing to tango. I've got no idea if they'll be able to pull it off, but they seemed willing to try different methods to make something work.
They definitely WON'T be doing color, and the biggest problem (assuming they can even pull it off) is that the minimum order quantity is 500 lmao. Basically means this is gonna be pricy as fuck to front. Not to mention shipping is gonna be insane.
So even if they can pull off a replication, I'm not sure it'll be possible for me to pull the trigger on production. Even just STORING 500 items is gonna be a lot. We're talking boxes. In a room. Forever. I'd be surprised if 200 sold. So unless the price per item is suuuuuuuper cheap, or they're willing to do a lower MOQ, I don't think this will be an option.
IF, it does become an option. Then I would likely just sell the non-colored versions. And then poooosssibly hand paint some for a lot more money. I'd need to have a really solid workflow figured out before hand...
But this is all really jumping the gun.
For now, I'll print the molds, cast em, paint a bit, and see what's up. I might do a small run of them for purchase if the workflow is ok.
AND. If all of this fails and was just a learning experience, I still have a Mabel sculpt ready for retopo/rigging!
---
So that's what I've been up to lmao. I'm really not a fan of drumming up hype for something that might not be a thing. SO I don't like sharing this stuff while there is so much uncertainty. This goes for TFOL too. Lots of cool things in the works, but some things aren't necessary 100% confirmed.
OK! I gotta get back to work on that game tho frfr lmao. LOTS of assets to make for act 4.
Gituku
2024-10-29 22:19:32 +0000 UTCDash62g
2024-10-29 16:29:50 +0000 UTCFancheesy
2024-10-29 13:44:28 +0000 UTCElazul
2024-10-29 10:11:00 +0000 UTCOwen Mulka
2024-10-29 09:50:01 +0000 UTCTheLapisFox
2024-10-29 09:07:14 +0000 UTCProYiffMaster
2024-10-29 06:31:41 +0000 UTCEmpi The Rat
2024-10-29 06:21:37 +0000 UTCChristopher Clark
2024-10-29 03:36:38 +0000 UTC