In this video I will analyze two methods of gilding in two of my paintings. I have not found names for these methods, so I will call them oil gilding and assisto. Rather, I found it only for one and I'm not sure. One method is to create a gold spot and the other is to create a gold line. I want to say right away that in these two works started, the gilding process did not go according to plan. Therefore, I had to change the method of creating the golden lines. But everything is in order.
The method for creating lines I use to create hair and sometimes for some ornaments. This method works well for creating fine gold leaf decorations. I want to emphasize that this method requires exactly gold leaf and not imitation of gold leaf, which is called (gold leaf). The difference between them can be seen in the video. The thing is that gold itself is a very soft metal and allows you to create sheets that are very thin. Imitation gold sheets are much thicker, therefore, during removal, they do not hold the shape set by the glue. Therefore, it is better to use real gold leaf in this method.
I used this method earlier to create hair and small ornaments. This time I was also going to use this method and even prepared the surface for this method as I usually did. But everything did not go according to plan as I suddenly ran out of gold. There was no time to buy new time, so I decided to use the Spanish method of drawing gold lines (el estofado). The advantage of this method is that there is no need to use pure gold, but imitation gold can be used. I have never had to create golden hair with this method before as I literally recently learned about it. More precisely, I knew about this method but did not know how to perform it. It is important to note that this method is completely different from the previous one. Therefore, I will describe this particular method.
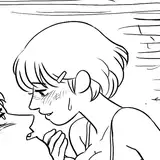
Piece 1. So for the first painting it was necessary to create a solid gold spot in order to then create folds with an ornament using glaze. This process is simple and there will be no difficulties, at least I thought so.
As I said, I prefer a smooth surface for gilding, so I prepared it in the same way as in the painting "Blue wall". First, I mixed the colors, although it didn't matter which ones. When the colors were blended I added chalk powder and mixed the paint with the chalk properly. This process is similar to kneading dough. Then I applied it to the canvas and let it dry. After the mixture was dry, I proceeded to sand the surface. Usually the surface of oil paint is difficult to sand, but thanks to the addition of chalk, it is not bad enough to sand. Of course, polishing to the ideal surface is possible, of course, but it takes much more time. Nevertheless, if you need to imitate a solid smooth base, then this method is suitable. After sanding, remove any accumulated sanding dust with a damp piece of cloth or cotton wool. The next thing to do is to apply a layer of shellac as shown in the video. Once the shellac is dry, you can apply the mixtion. And in this place you need to be careful.
Firstly, the place for application should be free of dust or hair, wool or something else, as it will all show through the gold. In the second, a lot depends on the mixtion you are using. If it is an acrylic mixtion, it must be applied in a small layer. To avoid puddles. As in the case of gold, this may be a mistake. In my case, I used an acrylic mixtion, but this was my first and last time I used it for gold. This glue works well for imitating gold, but not for gold itself. Since I got cloudy spots in the form of brush strokes. I guess the mistake was a lot of glue. The glue gathered in puddles and came out in the form of strokes.
In this regard, I had to redo the stage of applying the mixtion and gold. This time I decided to use an oil mixtion. Oil mixtion, in contrast to acrylic, has a longer drying period, therefore, after application, it is necessary to wait for the appearance of tack. It is not recommended to lay down gold before the time indicated on the bottle has passed. I have a mixtion that dries for 3 hours.
So, no matter what kind of glue you have, it is important to wait for the moment when it becomes sticky, but will not stain your finger when you touch it. When the sticky effect has appeared, you can lay down gold.
A few tips.
- to put a whole sheet of gold or imitation gold without folds and losses, you can use thin cardboard that has a smooth coating. But be sure to wipe the smooth surface which is for gold with cotton wool, as if you touch it with your hands, there can be fingerprints to which the gold can stick.
- the gold on the sheet can be moved with an elastic brush as shown in the video.
As you can see in the video, the gold sheets are overlapped, but at the same time the border of the joint is not visible or almost invisible. This happens when, in the event that the mixtion has the necessary sticky effect, and of course this is the advantage of gold, since it is very thin.
If you have the opportunity to use transfer gold, then use it as it makes it much easier to work with this naughty material.
By the way, one more piece of advice. If you have free gold, you can simplify the work by using wet paper. If you wet a sheet of paper, the gold will stick to the wet paper. In this case, wet paper becomes a convenient means of transporting gold sheets.
After gilding, I covered the surface with copal varnish, but you can also use an oil mixtion or shellac.
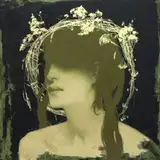
Piece 2. As I mentioned for this piece I was going to use the method of creating gold lines (Assisto, from Byzantine ) but then I had to use the Spanish method of creating gold ornaments or lines (el estofado).
To some extent, this method is simpler than the Byzantine method, but requires more gold, and besides, half of the gold will remain under the paint. Therefore, in my opinion, it is more appropriate to use imitation.
The beginning of this method is no different from the above mentioned method. The same steps, but then the golden surface is covered with a layer of yolk tempera. You can learn how to make tempera from my video “Estofado”.
So, after I put gold, or rather an imitation of gold (gold leaf), I covered it with a layer of shellac. The fact is that in the case of gold, I cover the gilding with some kind of varnish only to prevent mechanical damage. In the case of gold leaf, this must be done as this material tends to oxidize under information of atmosphere . Then I applied tempera as shown in the video. Then, using a sharpened wooden stick, I scratched out the path of the lines for me. It is important that the paint must be scratched before the paint dries, or then moisten the place that you are scratching with a damp swab. At the end I covered it all with copal varnish.
It is also very important to sharpen the tip of the wooden stick from time to time to create a thinner line.
That's all. You can highlight the video as I try to capture the most interesting and important moments. In case you have any questions do not hesitate to ask. The next video will be about glazing on gold and other finishing textures. Thank you