The final ninth shrine and it is a biggy. 50 images for all the interactive overlay tiles and base layer maps (torches, open doors, secret doors, the water's surface of the pools if you want to animate a slight ripple using Token Magic FX and a petrified wizard or a pile of ex-wizard rubble and yet more). There are multiple ways for you to arrange how you want to make your map and switch things on and off.
There's a banyan root covered roof and the treetops even further up, as this seems like it could be a good high place to do some scouting from.
No small alcoves
I did take a small liberty with the design of the interior. The original has these small round alcoves that seemed to serve no purpose, so to keep things just a little simpler on the walls... I removed.
Sun & moon
The sun and moon's position on the map are representational. They are each hanging directly over their respective pools, which should be communicated to the players upon entering. I included because it felt like a good visual clue as to what may be going on in the chamber.
In addition, the moon is not full. It made for a more recognisable shape in the water to not just be a white circle.
Mosaic
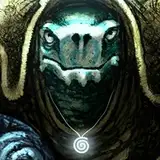
The description says the bear is small... well, I think Obo'laka's Shrine may well want to slightly exaggerate the size of their God in their art when battling their mortal enemy I'jin... so I chose a bigger, stronger representation of a Godly Bear to represent Obo'laka in the mosaic.
This concludes the 9 shrine maps.
24x24 : 100px grid
.jpg + .webp