Hello there
Now, come on let's get straight to this because it's going to be picture-packed enough this post.
Quite clearly, in normal days this would have been a video post, but the truth of the matter is I've not felt up to it. There was a lot of slow moving hobbling about, which is easy to negotiate when it's just pictures, but less so in film, so after briefly beginning to film it, I decided to do it old school instead. On the plus side it means we can linger on each stage, rather than have it all fast-cut and Hollywood-dynamic like all my videos are.
The Stretching Room (that's a picture of it up there in the header image) is an Octagonal room at the very beginning of the Haunted Mansion ride. I'm sure you're sick of hearing about it, but this can also be enjoyed as a build post, regardless of what it's theme is.
The first time I went on the Haunted Mansion ride (the first of only three times in my entire life) in 1980, I spent my time in this room in a mix of fear and disappointment. I'd wanted to go on the ride so much, but believed it to be a "ghost train", rather than something you walked around. I remember declaring that this wasn't the ride, and that there must have been a mistake as we were walking and standing, so had a brief strop. Subsequently, I don't remember enjoying the Stretching Room.
Since then, and certainly in the other two times I've stood in that room, I've grown to adore it. It's atmospheric, iconic, and aesthetically stunning. When Disney re-opened after the palaver in 2020, this part of the ride temporarily became a room the guests just walked through on their way to the ride itself. Obviously so as not to have a large group of folk standing still in an enclosed space. This must have taken so much away from the experience of that ride. It really does set everything up nicely.
In a nutshell, you are "locked" in a room where a disembodied voice (your "ghost host") explains that the tour begins in this gallery . The portraits on the wall slowly begin a "disquieting metamorphosis", stretching to reveal the full compositions, and then you crack on with the ride. That really was "in a nutshell" - it's better than that, but maybe have a look on YouTube. Interestingly, at Disneyland, the whole thing is a device to sneakily lower you beneath the ground (as that's where much of the ride is), but at Disney World, where this isn't necessary, it's just replicating the original ride.
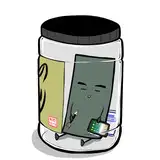
I got some statues of the folk in the portraits recently, that I'd wanted a long while but hadn't been able to get when I was there. I told you my pal Sammy recently visited Magic Kingdom, and she kindly brought three of them back for me. Then patron Dave Dodd blessed and cursed me with the information of where I could purchase a damaged version of the fourth and very hard to find, final one.
One of the ones from Orlando was also damaged in transit, so I had half of the statues in need of repair.
Luckily I am ace at that...

There's the damage in the haul...and here's me fixing it...

That third picture is me holding it off the table to show that it is set properly and safely.

That's the damaged one I got. Complete break of the hands, but a relatively clean one. I didn't do any pictures of me fixing it because it was mega-precision time with top concentration. Had to hit two surfaces exactly with glue that bonds in under two seconds. So you will understand why I was focussing on nothing but that...
However, I did do it, followed by a tiny paint touch up on the bonding line, and we finally have the collection in repaired order...

So, even though this post has been going for ages already, we are now at the start.
I really do think these are lovely as they are, but as you can see from the header image, these are the human elements to paintings, and I wanted to make a nice display for them.
I think, as a side note, this is always worth doing. Everything I get like this, I always have an idea for display. Either where I want to put them, or I how I want to 'deluxe' it up. I had a very definite idea for these statues, which I really hoped was going to work.
Here's what I did...

First up, I digitally re-painted the backgrounds excluding the characters. These pictures don't even begin to show what a job this was. It was hours, but I impressed myself with the accuracy I managed on them. There's an argument I could have just photoshopped out the figures of whatever, but I really thought a full repro would blend better. I should also point out that, whilst that last picture might look like a rough black blob, these are all accurate to the originals. If you have issues with them, then you need to take it up with original artist Marc Davies who I am pretty sure is no longer with us.

There they are all printed and chopped. I was really happy that I remembered to leave a border, as they needed glue around the edges to attach them to the frames.
Shall we do the frames? Here's how I measured everything out...

Yeah, you didn't know I could proper technical drawing, did you? Regular little pudgy draughtsman me. All that gets put into effect as such:

Little bit of sanding on the rough edges and we are good to go with the frame part of it all.
A bit more incorporated artwork first though. I decided to utilise the octagonal pattern that features on the ceiling and floor of the stretching room into the base. That way, despite this being four separate pieces, they would all fit together as a relevant pattern.

That's a tiny picture of the real life carpet, and here's how I drew it and re-chopped it to fit over four bases:

I appreciate this has printed so rich that it looks much redder, but in real life it's a very deep orange. A sort of blood orange colour, which I'm perfectly content with. That's them all ready to be attached to the bases.
And here are the bases:

I sprayed the edges black, and did consider doing a trim on the front with some of the leftover beading from the frames. However, it would make an imposing ledge, and I didn't want to overdo it.
The only aspect I was concerned about were the finishing corners of the frames. They weren't the sort of thing I could mould or carve, as they're proportionally tiny. I did work out an alternate method though.
I drew them as a template...

Then I printed this through the Cricut machine to score the shapes into card...

The corners on the circles were originally going to be cut out completely, but they were so tiny it was near impossible. I worked out that I could just cut away the top layer of the card and still give them a satisfactory depth. In fact, this was probably better than they would have been chopped out completely. One of those happy accidents. I gave them a gentle sand to take as much of the roughness out of them, and then got everything painted up.

I used the one-coat garden wood paint for this, as it was a nice colour match to the originals and it came out a dream. Particularly as it kept a bit of texture on the frames themselves, which varied up the tone.
Then it was a case of simply putting it together.

The corner pieces are stuck onto the beading frame, with skewers as an attachment to the foam base, then the artwork is stuck to the back of the frames with impact glue. It's SO satisfying to make something so effective using relatively simple methods.

Because I opted not to glue these to the stands, I retain the option to swap around the statues if I get bored with them.

And yes I have started using my kitchen as a workspace because there is stuff on every other surface. What you gonna do about it?
I was properly dead pleased with the display, but there was still a moment of truth to be had, and such is my mind that I was still apprehensive about whether this would work with the statues added to the display...

And then I was fine.
In fact, I was a bit giddy about it. Really, properly delighted with it, and completely proud of myself for doing it properly and enhancing these statues in a way that serves them well rather than detracting or overbearing them.
And yes, I really wish I'd done this as a video, but I promise you I wasn't (and I'm still not) physically up to adding that into the process. Hopefully this was still of interest and maybe inspiring for those of you with a casual artistic bent or memorabilia collection.
I think it's all about the idea, and working out how to execute it. I'd love to claim this was well difficult, but it's not anything that would be beyond anyone who focussed on it. It didn't require moulding skill or that sort of thing. The only thing that required some level of artistic ability was reproducing the paintings without the characters, but that could be done with photoshop. I just personally wanted to have a crack at re-painting them myself.
There's still some additions to be added to this potentially, which are a slightly more difficult task, but you shall hear all about that when I get advice from my modelling mentor Stuart Bray tomorrow. No spoilers yet, but I'm a rather tempestuous and impulsive Padawan from time to time...
Hope you are having a wonderful week. I've been in a semi-deep planning phase of Loopholes and Tales From Castle Diablo since completing this build over the weekend, so I'll try and articulate some of that to you later in the week too. I had no choice today as Patreon went down for a while, halfway through this post.
Other than that, all is moving really nicely, and there's a bit of excitement and enthusiasm in the air on both Loopholes and Diablo...
Much love as always
xxxxxxxxxxxxx
Craig Harrison - Cult Cat Fusser
2022-06-22 19:40:12 +0000 UTC