In this guide, we're going to look at using World of Warcraft assets as tabletop props. This will primarily be aimed at Tabletop Simulator (TTS), however a lot of the methods covered will be applicable to other tabletop platforms, 3D printing and beyond.
Before we begin, you'll need the latest version of wow.export, as well as a 3D software of your choice. I'll be using Blender, since it's free (and awesome).
Chapter 1: Basic Props
Let's jump straight into it with something simple. Open up wow.export either with a local installation or using the Blizzard CDN.
For our first prop, let's start with a simple crate. In the Models tab, search for a crate and pick one you like. I'll be using 6hu_storehouse_crate1, specifically.

Be sure to uncheck the Texture Alpha option on the sidebar, then go ahead and hit the Export as OBJ button at the bottom.
The reason we uncheck Texture Alpha is because unlike with normal images (such as a PNG), the textures in WoW often carry non-transparency related data in the alpha channel.

Given that our target application won't understand this, we simply export the textures without it. In some cases, you'll want transparency, but we'll cover that in a later chapter.
Once exported, we should have a few files in our export directory:
- world/expansion05/doodads/human/doodads/6hu_storehouse_crate1.obj
- world/expansion05/doodads/human/doodads/6hu_storehouse_crate1.mtl
- world/expansion05/doodads/human/doodads/map1-d.png
For the purposes of TTS, we don't actually care about the MTL file, since it only supports a single texture (more on this later).
Over in TTS, add a custom model (Objects → Components → Custom → Model) and load the OBJ we exported into the Model/Mesh field. Load the PNG we exported into the Diffuse/Image field.

In the Material tab, I normally set the material type to Wood for the best overall look, but you can adjust as you see fit.
For the examples in this guide, I'm using local files to demonstrate, however if you intend to use these assets for multiplayer, be sure to host them on your Steam cloud, or a file hosting service.

There we have it, a simple crate prop on our tabletop. Pretty simple, right? Let's move on to some trickier things.
Chapter 2: Multiple Textures
As mentioned in the previous chapter, TTS only supports one texture on an object. Let's take a look at a less simple object, such as 8tr_zandalari_cratestack01.

Instead of just one texture, this object actually makes use of three separate textures. If we try to import this into TTS, we're going to end up with something that definitely doesn't look right.

To resolve this, we're going to do some texture baking. I recently made an in-depth guide on the process of texture baking WoW assets, so rather than repeat it all here, go ahead and follow that guide through.
Note: Depending on your use-case, stick with baking textures at around 1024x1024 or 2048x2048 resolution. Larger quality textures offer almost no benefit for TTS and dramatically increase download times for other players.
Patreon Post - WoW 3D: Texture Baking
Once you've returned from that guide, you should now have a nicely baked object in Blender, which will look a little something like this.

The first thing we need to do from here is save the baked texture from the Image Editor panel (Image → Save As...) and save it as a PNG somewhere for later.
Additionally, since we'll be using our baked UV map, we need to export a new OBJ file. To do this, go to File → Export → Wavefront (.obj), and on the dialog window, check the Selection Only checkbox, then export it somewhere.

Once that's done, head back into TTS and follow the steps from Chapter 1 to import a custom model, this time using both the baked OBJ and PNG that we just exported from Blender.

If everything went to plan, you should now have a lovely looking prop with nice textures. Using this method, we can bake buildings for use as props too!

You can even merge multiple objects (CTRL + J to merge objects in Blender) and bake them together, allowing you to produce prefab prop groups, such as this inn table.

Everything on the table in the above screenshot, including the table itself, is one single model combined this way.

Not only does this make creating/managing scenes made with props much quicker, but it's also makes them quicker to download for players since it's just a single model and texture; this adds up quickly on a busy table with a lot of props.
Chapter 3: Collision
By default when we import a model into TTS, it uses the bounding box of the model for collision. A bounding box of a model is a 3D volume that goes from the lowest X, Y, Z position, to the highest X, Y, Z position of the model, encompassing it in a primitive manner.

Using a bounding box like this for collision is super efficient, as calculating intersections of a 3D cube is really simple and quick, but it comes with the downside that everything we put on the table is floating.
TTS allows us to specify a Collider mesh for an object, which is an invisible OBJ model which it uses to calculate collision instead of the actual 3D model itself.
A quick and easy solution is to use the 3D OBJ of the model itself as the Collider mesh. If your collision mesh is not flat, like the table here, you'll need to check Non-Convex as well.

Using the 3D model itself for calculating collision is quick, simple and means that you'll get accurate physics interactions, such as these die which can even be balanced on the individual props on the table.

But if it was that great of a solution, it would be done by default, right? The table above comes in at 1,713 polygons, which even with all the optimized collision math, is way too much for a simple table collider.
In the interest of not wasting CPU cycles, especially in a larger scene, we're going to use a collider mesh, which is a separate 3D model used to compute collision.
This method is used in basically every video game, including World of Warcraft. To make our lives easier, wow.export allows you to export the collider mesh for WoW models as an OBJ, which is the exact format we need.

In your wow.export settings, ensure that Export Model Collision is enabled. When you export your object, you'll find an additional .phys.obj file beside it.
Taking a look at this collider mesh (green), we can see how the collision for this tavern table is achieved with a single six-sided trapezoid.

Over in TTS, import our table again (or edit an existing one) and supply the .phys.obj file as the Collider mesh.

Now we have our table with a super simple collision mesh straight from the game, and it only cost us a single extra click.
In some scenarios, you may find the given collision mesh for a model insufficient, especially when joining multiple objects together as a prefab. What if you want to be able to slide things between the table legs? Or rest a dice atop the book?
For this, we're going to create our own collision mesh, which is simpler than it sounds. Back over in Blender, with our prop still in the scene, add a new cube to the scene (Add → Mesh → Cube).

With the new cube selected, switch to Edit Mode (Tab), enable Face Select, and switch to the Move (Transform) tool.

Now if you go ahead and select one of the faces of the cube, you can use the 3D transformation widget to adjust the dimensions of the cube.

Adjust the dimensions of the cube as necessary until it covers the top part of the table. The white cube is going to represent the parts of our model which are solid, objects will simply pass through everything else.

Now that we've covered how to make a collision mesh, let's cover how to get it out of Blender and into TTS.
In Object Mode with your collision mesh selected, go to File → Export → Wavefront (.obj). In the dialog that appears, that are a couple of settings we want to ensure we have enabled.
Limit to Selection Only (Enable) → Make sure this is checked so that we only export the collision mesh, and not our original 3D model.
Triangulate Faces (Enable) → Like most game engines, TTS requires models to be made of triangles (faces of three vertices) and not quads (faces of four vertices).
Write Materials (Disable) → Since we're not using any materials for a collision mesh, there's no need to write an MTL file.

Over in TTS, import our model again (or edit the existing one), and this time specify the collision OBJ we just created as the Collider mesh.
A simple cube like this is really efficient and provides us with a solid table top to place things onto, but as you may now see, there's a flaw in our design.

A collider mesh doesn't just define how other objects will interact with the model, it also defines how the model itself will interact with the world. Without the table legs defined as solid parts of the collision, it won't stand up properly.
In Edit Mode with the cube selected, add another cube (Add →Cube), and then transform that cube until it covers one of the table legs.

Repeat this for the other three table legs. To speed things up, we can duplicate the faces we made for the first one by selecting them and using Shift + D.
It's good to remember that these don't need to be perfect, and we're trying to be as primitive as possible on purpose - the less geometry, the better performance.

With our table legs now included as part of the collision mesh, go ahead and export it again as we did above and load it as the collider for our table.

If we want the props on the table to be included as part of the collision, we can add as much geometry as necessary to cover everything. Just remember to keep things primitive; less is more!

There you have it, we've now created a prop with our own custom optimized collision.
This is one of the most common methods of collision in video games, so if you've ever found yourself getting stuck on invisible corners or standing in thin air beside an object, now you know why.
Chapter 4: Transparency
Up until this point, we've been working on models that don't include transparency, but there are plenty of models out there that do include it. In this chapter, we're going to cover that.
To start with, export your model from wow.export, but this time enable the Texture Alpha option on the sidebar. For this example, I'll be using 6hu_storehouse_cratestack4.

In some rare cases, where an object uses a single texture and the alpha channel only carries transparency data, you could import the model directly into TTS from here.
It's rare that both these criteria are met, and our crate stack here is no exception. Go ahead and import it into Blender using the wow.export Blender add-on, and be sure to disable the Use Alpha option on the import window.

The wow.export add-on will import models with the Alpha Mode set to Channel Packed, this means the RGB channels are not affected by any data carried in the alpha channel, which as explained earlier often carries non-transparency data.
Disabling the Use Alpha option doesn't change this, but it instead means that by default, the alpha channel of the images won't be hooked into the alpha socket of our Principled BSDF nodes - this saves us some time.

Instead of having to go through every material and disable the alpha channel, we can now just find the texture that we actually need transparency on, and hook up the alpha channel as necessary.

Just like that, we now have a model with working transparency in Blender. Before we can take this bake into TTS though, we need it to be a single texture.
Skip back to Chapter 2 and follow the guide on baking, which includes a chapter on handling transparency, and includes an automated script which can also handle it for you.

Once done, you should have a model with a single baked texture - which includes transparency. Save the texture and the model, as done in Chapter 2, and you're done.
Make sure when saving your texture that you choose RGBA so that the alpha channel is included.

Switch back into TTS and import the model just as we have done in the past.

Providing everything went to plan, you should now have a nice little prop complete with transparency.
Chapter 5: Character Models
In this chapter, we're going to look at how we can take a player character model and put it into TTS. Before we start, we're going to need a character.
I've recently published three guides that will be useful here. The first one provides my character rigs along with a guide on how to configure, texture and pose them.
Patreon Post - WoW 3D: Character Models
The second guide delves into item components, such as weapons, shoulder pads, and other attachable pieces of gear.
Patreon Post - WoW 3D: Item Components
Finally, the third guide is a beginners guide to WoW 3D art, however Chapter 7 contains a good walk-through on how to apply in-game animations to a model.
Patreon Post - WoW 3D: Beginner's Walkthrough
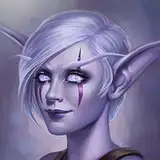
Following those guides, go ahead and set yourself up with a character model. For this example, I've created a model of Lexa Cogsprocket and pre-applied a combat animation with removed key-frames, as shown in Chapter 7 of the third guide.

The first thing we need to do is merge everything together as one mesh.
Before we do this, we need to make sure our UV map names are consistent. By default, the UV maps for my character models are named DiffuseUV, whereas item components from wow.export are named UVMap. You can either manually conform them, or here's a little Python macro that will fix them, simply select everything and run that once.
Now let's select all of the geosets and item components, and then press CTRL + J to merge them together.

Make sure that you don't have the armature or parent selected, otherwise it won't merge. Once done, you should be left with a single mesh.
The next step is to bake everything to a single texture. To do this, skip back to Chapter 2 and follow the guide on baking; 2048x2048 is a good resolution to use for a character model.
If you're using the automated baking macro (which I highly recommend), be sure to set bake_alpha_mask to False, as it will treat the various alpha channels in the skin shader as transparency, resulting in a mostly invisible character.
If you need transparency to be included, such as on a cloak, follow the steps in Chapter 6: Upscaling in the Character Models guide first to bake the skin to a single diffuse texture, remove all of the nodes (except the baked diffuse) from the skin shader, and then follow the steps above with bake_alpha_mask and channel_pack_alpha_mask set to True.

Once done, you should now have a baked character texture, be sure to save it externally as a PNG for later.
With the model mesh selected, click File → Export → Wavefront (.obj), and just like we did in the collision chapter, adjust the export settings as follows.
Limit to Selection Only (Enable) → Make sure this is checked so that we only export the character mesh and nothing else in the scene.
Triangulate Faces (Enable) → Like most game engines, TTS requires models to be made of triangles (faces of three vertices) and not quads (faces of four vertices). Models from WoW are already triangulated, but it's always best to be safe.
Write Materials (Disable) → Since TTS only uses a single texture, it doesn't use an MTL file, therefore we don't need this.

Once done, switch back to TTS and import the OBJ and PNG that we created together, and you should have a working character miniature.

As a minor note, I accidentally used an Emission shader instead of a Diffuse on the goggle lens, which is why it appears black here; keep that in mind when baking own models.
Chapter 6: Double-Sided
When working with models from World of Warcraft (or most games, for that matter), you may notice that thin surfaces are often duplicated, with the inverse normals.

The common default behavior in 3D rendering is for a 3D face to be one-sided. This makes sense when you consider that for 99% of models, we never see the inside of them, so it would be wasteful to render/calculate it.
If needed, it is possible to render a face as double-sided, which is often the default in 3D rendering software, however for video games it's often preferred to use duplicated geometry with inverse normals instead, since a common optimization is to automatically cull (ignore) polygons which face away from the camera, leading to significant performance gains.
It's for this reason that if you import a model into TTS that has a flat surface and hasn't been duplicated/inversed, it's only going to render on one side.

Most models from WoW do come with duplicated/inversed geometry where it makes sense, such as hanging banners or portals, but there are some scenarios where they don't.
Let's assume we have a model that doesn't, let's cover how to fix that. Start by enabling Face Orientation in your viewport in Blender.

With this overlay enabled, parts of your model which have outward facing normals will appear blue. These parts are going to render correctly in a one-sided rendering mode.
Inversely, parts that are coloured red are inward facing, and will be culled (ignored) when rendering in a one-sided rendering mode.
To fix this, enter Edit Mode with your object selected. Make sure to deselect everything (A toggles selection) and then select the red part.

Now duplicated your selection by pressing SHIFT + D followed immediately by ESCAPE (to cancel translation). Without adjusting your selection, press SHIFT + N to recalculate the normals of the duplicated faces we've created.

It may be hard to see as the faces will be overlapping each other, but you should now have two identical surfaces facing in inverse directions. If necessary, you can pull them apart temporarily to check that the blue sides are both facing outward.

If you run Recalculate Normals (SHIFT + N) but the wrong side is red, run it again and toggle the Inside option.

Once done, you shouldn't see any red surfaces on your model anymore.

Go ahead and export your model just as we've done in the previous chapters using File → Export → Wavefront (.obj), and use the following settings on the export window.
Limit to Selection Only (Enable) → Make sure this is checked so that we only export the model and nothing else in the scene.
Triangulate Faces (Enable) → Like most game engines, TTS requires models to be made of triangles (faces of three vertices) and not quads (faces of four vertices). Models from WoW are already triangulated, but it's always best to be safe.
Write Materials (Disable) → Since TTS only uses a single texture, it doesn't use an MTL file, therefore we don't need this.
Back over in TTS, import the model once again, and it should now be rendering on both sides; success!

Chapter 7: Conclusion
This guide was a little more specifically tailored than normal, but hopefully it was helpful or insightful to you in some manner, or perhaps you just learnt something new.
As always, if you need any help with the things mentioned in this guide, wow.export, Blender or so on, feel free to ping me in the #champions-lounge channel on my Discord server.
That's it for now, thanks for reading!