WIP 06 (Foreground GLITCHINESS)

After finishing the background I started on inking and colouring one of the characters. The character you see here has a glitchy overlay to it.
2017-08-16 15:00:02 +0000 UTC View Post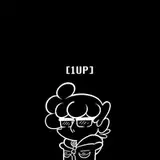
After finishing the background I started on inking and colouring one of the characters. The character you see here has a glitchy overlay to it.
2017-08-16 15:00:02 +0000 UTC View Post
After I added the clouds I used a texture called "Mortar" which is set to Overlay, then I lowered the opacity to 25% giving a dark background with a slight texture to it.
2017-08-16 13:00:01 +0000 UTC View Post
Somewhat of a finished result of the background.
2017-08-15 15:00:01 +0000 UTC View Post
I keep everything on separate layers so when I'm ready to ink and colour it I can just hide the layers so that I can focus on one thing at a time.
2017-08-15 13:00:01 +0000 UTC View Post
The best way to make comics faster is by working on small panels that either have a minimalistic background or no background at all.
2017-08-14 15:00:06 +0000 UTC View Post
After everything was completed I added a "woosh" sound effect. I separated each letter and arranged them to go from smallest to largest by shrinking and expanding each letter.
2017-08-13 15:00:01 +0000 UTC View Post
Managed to animate this just before the month ended! :D
2017-07-27 20:08:14 +0000 UTC View Post
Experimenting with small pages. And I love it.
2017-07-20 14:00:01 +0000 UTC View Post
Experimenting with small pages. And I love it.
2017-07-20 13:00:01 +0000 UTC View Post
BONK! This new weapon is great! BONK!
2017-07-20 12:00:01 +0000 UTC View Post
LOOK! Better animation! :D
2017-07-20 11:00:02 +0000 UTC View Post
After colouring I chose a darker tone for the bottom of the stack using the Gradient tool. Before all that I did the background with the clouds around the stack.
2017-06-30 13:00:01 +0000 UTC View Post
Here's the inking process of the massive hay stack shooting off of the panel and into the SKY! :D
2017-06-29 13:00:02 +0000 UTC View Post
Here's the newest page from my webcomic, hope you enjoy.
2017-06-17 17:00:01 +0000 UTC View Post
Here's the newest page from my webcomic, hope you enjoy.
2017-06-17 11:00:00 +0000 UTC View Post
Want to find out what happens next? Well come donate to my patreon and find out!
2017-06-16 22:55:38 +0000 UTC View Post
I started this off by inking and colouring the simple panel first. Right here I've shaded and selected the parts to give its tones.
2017-06-04 12:30:01 +0000 UTC View Post
For this I had no choice to copy and paste the same panel. I did this because it's the same scene but on the right I was going to add the massive hay stack next to the other character.
2017-06-02 12:30:01 +0000 UTC View Post
Here's the latest page from my webcomic. A simple animation for ya.
2017-06-02 11:28:01 +0000 UTC View Post
Here's a detailed version of the massive hay stack. I added some hay falling off of the stack to show off how large the stack really is.
2017-06-01 12:30:03 +0000 UTC View Post
Here's the latest page from my webcomic. A simple animation for ya.
2017-06-01 11:28:01 +0000 UTC View Post
Here's the latest page from my webcomic. A simple animation for ya.
2017-05-31 11:28:01 +0000 UTC View Post
Here's the most animated page I've done!
Follow me on my Tumblr for updates and my artwork.
2017-05-18 15:00:17 +0000 UTC View Post
Follow me on my Tumblr for updates and my artwork.
2017-05-18 14:30:00 +0000 UTC View Post
Here's the most animated page I've done!
Follow me on my Tumblr for updates and my artwork.
2017-05-18 14:19:00 +0000 UTC View Post
I added the sound effect first by resizing and rotating the words and giving it a small black border. THEN I added the speech bubs. I pretty much did the same thing with the sound effect, but with wor...
2017-05-17 12:30:01 +0000 UTC View Post


