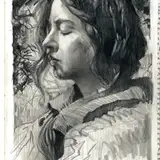
I'm sharing a side-by-side example of all the things I see early students doing wrong when it comes to tackling deeper understanding of the human form, specifically the portrait, and my own version of where to aim instead.
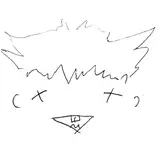
The top left portrait version is - granted - a bit exaggerated, and the purpose of this is to help make the following points more clear. I've left my own approach to the portrait study incomplete (bottom right), because it doesn't matter that I get it polished for this demonstration, and also I find that pockets of unresolved work are not only insightful but engaging for the learning experience. Maybe you will as well?
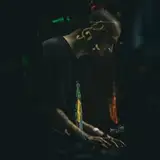
The reference I worked from, a random portrait sample off the internet, is included in the imagery.
***I want to be clear - This is my own personal experience from my journey through being a student to practicing professionally, and working with other art instructors and students. I do NOT claim this is the ONLY way to draw! What I am providing is what I know holds artists back WHEN they are intentionally trying to broaden their knowledge of human anatomy and figurative rendering in a REPRESENTATIONAL manner. We all must first learn the rules, the basics, the foundation, before we can then break them, playfully take creative license, and impose artistic liberties.***

Top Left Portrait - What NOT To Do:
- Start with a heavy-handed contour
- Chicken-Scratch to find confidence in the contour
- Arbitrarily place a classic cross-grid (after beginning) to make-believe you're measuring correctly
- Draw the outline of forms (like eyes and mouths) you think you know without looking at the life reference for guidance and correction
(*Draw what you imagine is true instead what is actually true)
- Keep to hard pressure in uniform line-weight contouring (i.e., drawing with only one kind of line)
- Locking in forms (shape and contour of head/features) first, without building on workable layers of movable gesture or measuring marks
- Avoid measuring forms against one another
-Keep erasing for fear of being messy or wrong
- Think that every attempt has to be perfect, putting pressure on every move you make
Top Right & Bottom Right Portraits - What To Do:
- Start with light pressure applied to softer gestural mark-making (of your choice)
- Stay loose (and therefore workable/forgiving to the sketch) by finding the form without committing to a hard and rigid line
(*You will help this by relaxing the hand, elbow, and shoulder, and elongating the spine, as you work - POSTURE AFFECTS RESULTS)
-LOOK before you mark, if your confidence is low. You will not do the thing justice by chicken-scratching your way in circles.
- Employ basic anatomical measuring
(* this takes time to understand, and requires practice with correct resources)
- CHECK YOURSELF: just because you marked it down doesn't mean it is right, and if you accept that you will get things wrong, you will more easily make improvements, so keep marks lighter while you are finding the form and building into accurate rendering
- You're going to be wrong, so don't be afraid of some mess in the medium
- Build value (shadow/light shapes) off of the marks you've made for finding structure (*shapes of form, light, and shadow INFORM each other, it's all connected)
-Line-WEIGHT Variation is vital, there's more than one way to apply the pencil to the paper
- Rely less on line/contours and more on tonal shapes to build depth
- Pay attention to edges (they are not all defined or hard)
- For accuracy, "likeness" comes from capturing the details of the relationship between structure/shapes. Get the shapes right instead of worrying about things like lashes or the iconography of the eye in your imagination...
-Remember perfection is impossible, and the enemy of learning from the experience!
-Start again with a new one if you need to, there's no limit on this...
Was this useful or inspiring for your practice? Let me know in the comments below!