AMV shot breakdown/inbetweening showcase
Added 2023-05-13 16:00:04 +0000 UTCHi! I haven't forgotten all the extra content I promised to do about the AMV >:3! Here are a few of the shorter shots broken down in a bit of a different way than what I usually do!
It took a while to edit but I tried my best to show visually how the timing and inbetweening is laid out and what order it's done in :) It might move a bit fast or feel hard do understand but I do encourage to pause and try and distinguish the keys, their timing and how the evenly filled in inbetweens smoothens everything out!
More explanations for each shot:
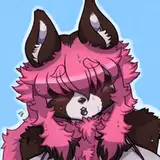
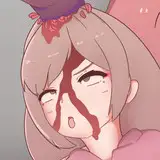
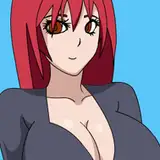
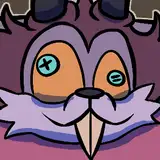
Shot one features the main action of her head rotating and lifting with the ears, paw, blinking, bangs and expression change being timed differently (with more experience this becomes more natural/easy to plan out all at once. Animating body parts seperately/on different layers is recommended when starting out!)
I personally wanted her nose to be lifted/dragged behind the rest of her neck and head, I showcase this with the red dots, you can see how the neck fur is evenly spaced during the breakdowns whilst her nose is still slowly catching up. I also constantly think about spacing and the arcs especially when doing the first inbetweens: relying too much on onion skin will have body parts move too much in a straight/2D line and lose the sense of space and perspective (something the red dots again presents visually by having arcs!)
I also included something reminiscent of a timing chart to help visualise the inbetweening and their placement in the movement. One mistake I often did whilst working on slow ins and slow outs was putting an inbetween right in the middle of 2 keys on the timeline itself when it should be closer to one of the keys as more inbetweens are filled in towards the other key; slowing down the movement and spacing.
To me the confusing part about timing charts is how the chart placements/layout tricks your eye into thinking they correspond with how the animation should be drawn (like the inbetween should be closely spaced/resemblant of the breakdown/big dark dot marking because it's placed closer to it on the timing chart when in reality the bent shapes are what indicates the spacing of the inbetween and which frame it should derive from; with the empty spaces on the timing chart being left for filling in more information).
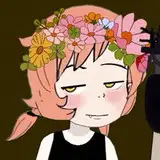
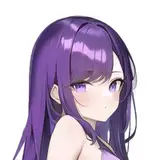
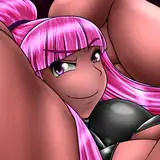
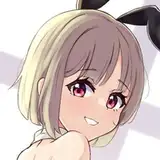
Shot two is more rushed overall and could've looked more natural and evenly spaced had I timed and planned it more and not gone directly to inbetweening. Because of the experience I have I could still wing it decently but because of the lack in planning and no breakdowns it comes off more mechanical, just going from point A to point B. The exception which adds more life is the rotation at the end; whilst slowing down the speed of her neck/body in continuation with the first part of the shot I'm upping the speed of her head rotating and catching up with the camera.
The most noteworthy part is that the beginning is spaced quite evenly right away; giving a constant movement until the end where she slows down, hence only one extra frame for the last round of inbetweening.
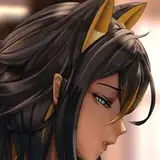
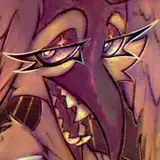
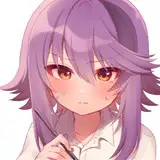
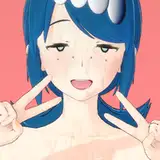
Shot three is a combination of favouring frames (not doing inbetweens right in the middle of two keys but instead favouring one key and making the inbetween look more resemblant/characterized by it) and also relying on the onion skin to inbetween due to how fast the shot is paced. I have a tendency to focus too much on evenly spaced inbetweens instead of favouring frames and sometimes end up with too slow or constant movements, in this shot I made sure to finish the rough animation and try out pacing the frames instead of going directly to inbetweening and it really helped to make the movement feel natural!
I hope this helps a bit in any way! It takes a while to put together so do let me know if more layouts like this would be of help or if it's too much of a visual mess haha
Comments
Ooh!!! Thank you so much!!! Super helpful!
GrayclawtheGreat
2023-05-13 22:22:00 +0000 UTC